Posted on

Geometric Bear

Geometric Bear
Geometric Bear
Geometric Bear

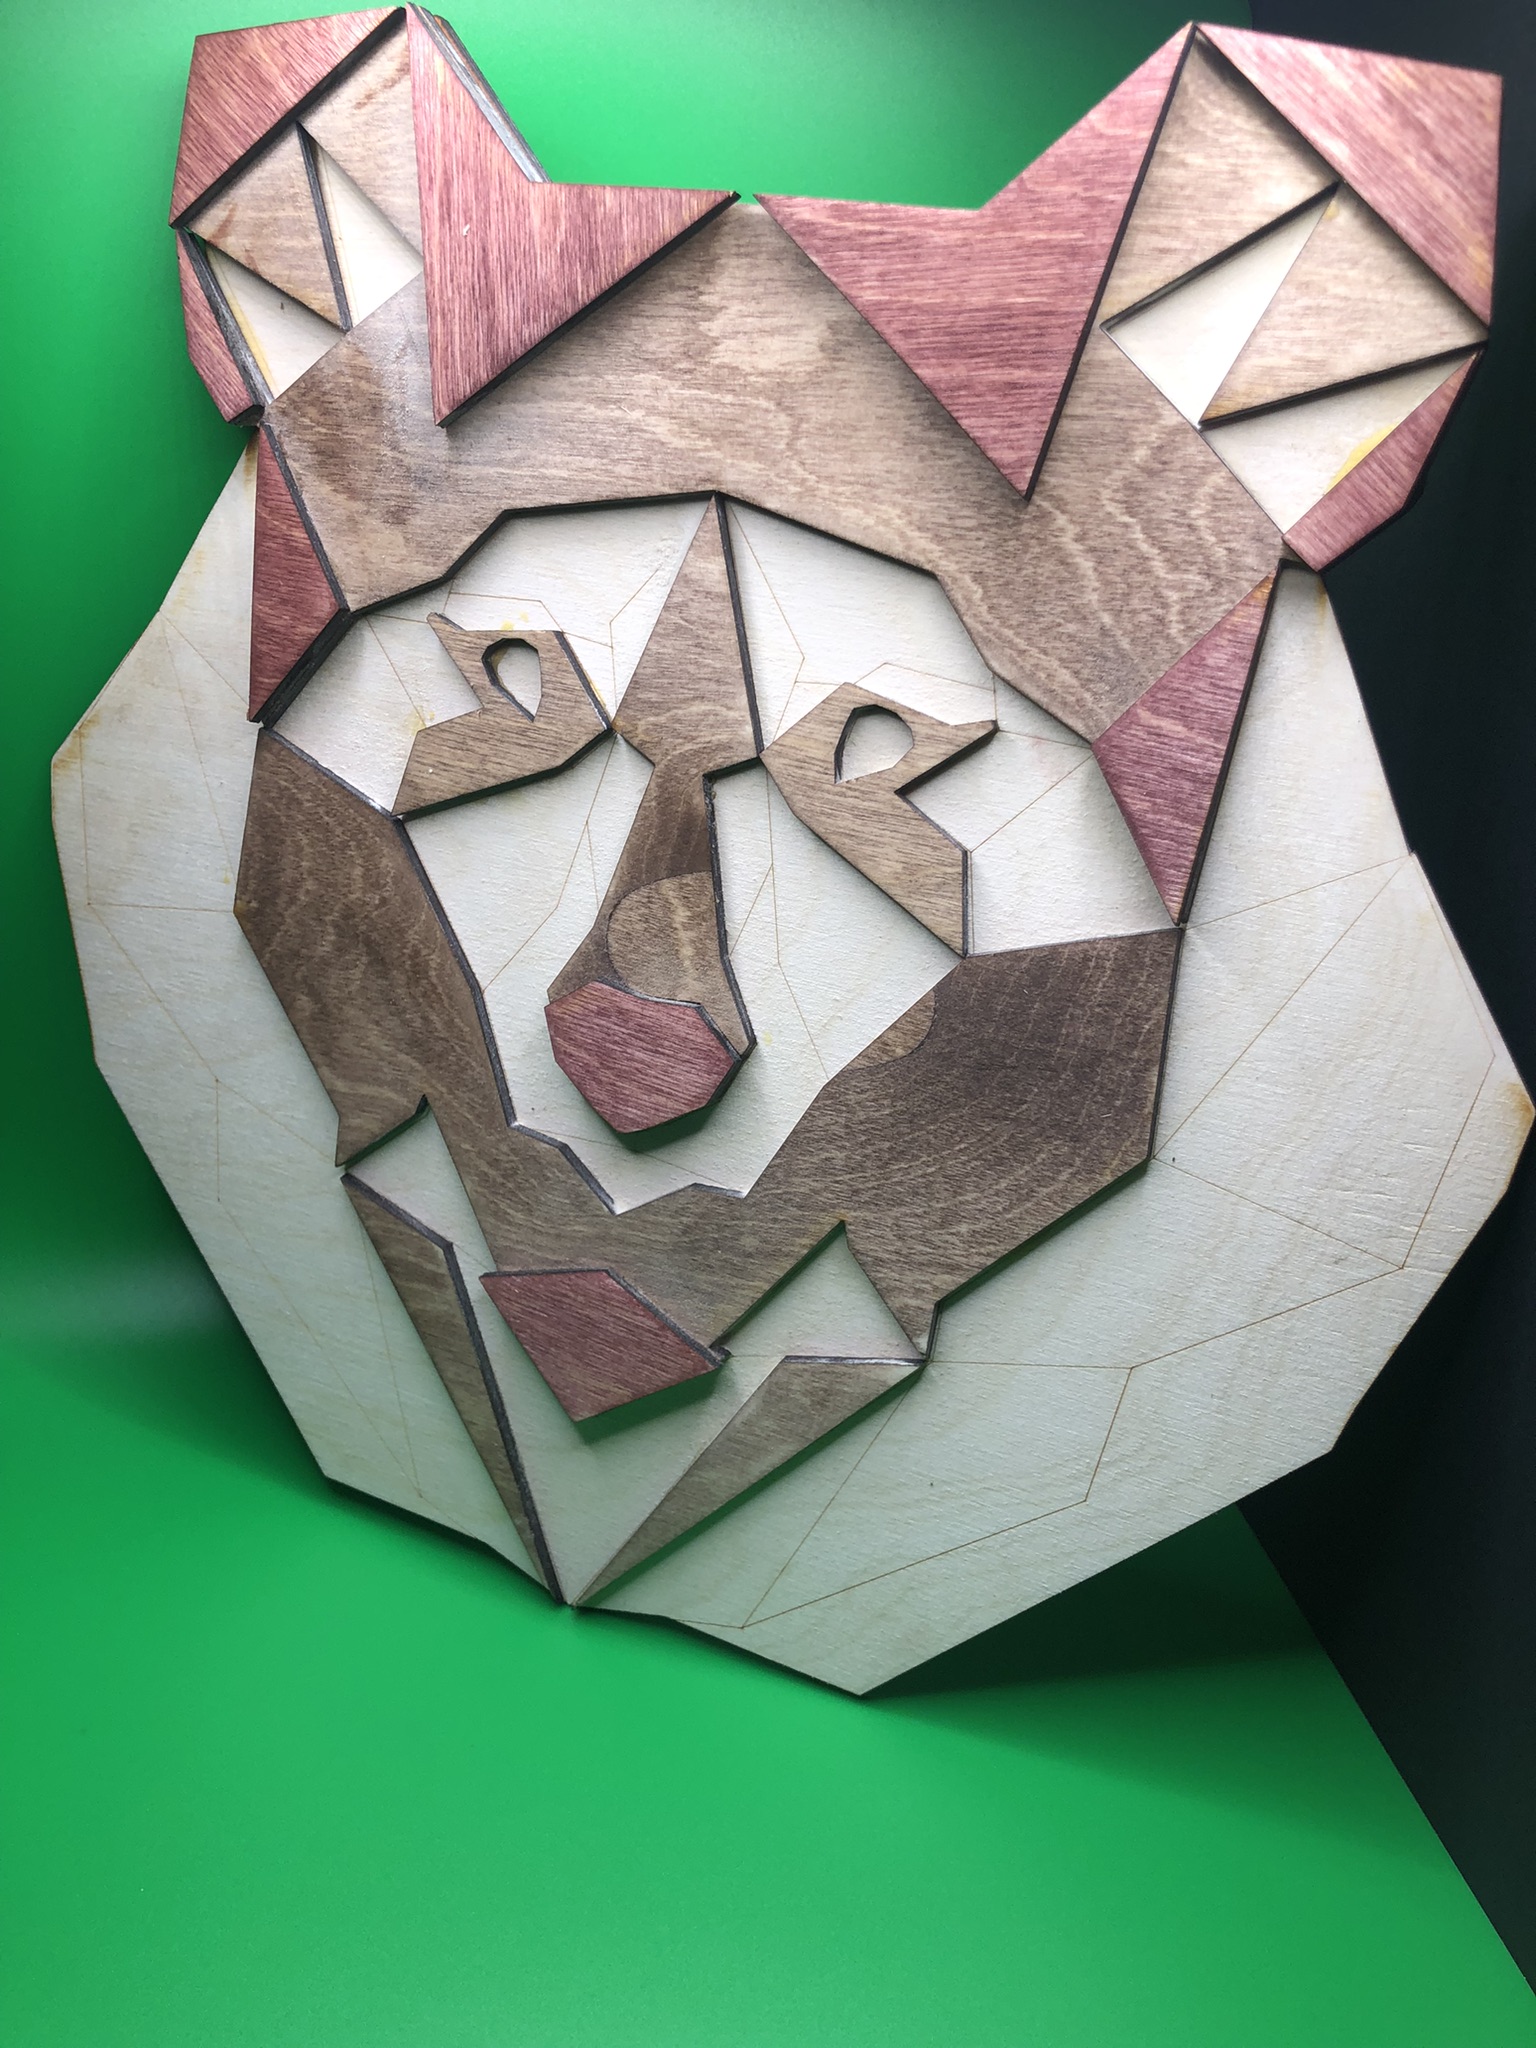
The Geometric Bear was a challenge I have looked forward to for a while now. I don’t typically do 2 dimension designs or layered designs, it’s not really my skillset. I wanted to try anyway. I don’t hate the way it looks but if someone prints one out, send me the pics! Hopefully I will learn how to do this.

Geometric Bear

This is how it came out in the light box. https://amzn.to/3Pq8j6S. #ad

Wish I had scored a little darker on some of the shapes but overall I like the outcome.

Check below for some of the products I used.

Join the mailing list to be notified of future Free files, Paid files, or Training Videos!

Subscribe

* indicates required
/ ( mm / dd )
What do you want to be notified about?

Wood

The wood is from https://amzn.to/3oyG8Xq #ad

Stain

Layer two stain https://amzn.to/44YxhQP #ad

Top layer stain https://amzn.to/3Rrri3U #ad

Light Box

I also have been playing around with some better ways to get pictures. I used this light box and I like it. I think I will get the bigger one though https://amzn.to/3Pq8j6S. #ad

Tape

The tape I use is https://amzn.to/3epaUvY #ad

Drop your thoughts in the comments below or join the conversation on Facebook in the Glowforge Creators group.

As an Amazon Associate I earn from qualifying purchases.

Say thanks by clicking any of the ads. You don’t even have to buy anything! Threetoedbear.com is a participant in the Amazon Services LLC Associates Program, an affiliate advertising program designed to provide a way for websites to earn advertising revenues by advertising and linking to Amazon.com. Some of the links below are affiliate links. This means that, at zero cost to you, I will earn an affiliate commission if you click through the link and finalize a purchase.

Posted on

Parts Bin

Parts Bin Digital Download

I was in dire need of some organization so I created the Parts Bin.

There is something just so satisfying about designing something that doesn’t require glue.

I needed something to get the workshop a bit more organized and here it is.

Fun little design with lots of sizes available and upon request.

Join the mailing list to be notified of future Free files, Paid files, or Training Videos!

Subscribe

* indicates required
/ ( mm / dd )
What do you want to be notified about?

Parts Bin

This is a fun little parts bin design that requires no glue. I would probably still use some just to firm it up in a shop but it is pretty sturdy with the right material thickness. Feel free to email me for a size request hereon Facebook, or in the Facebook group Glowforge Creators. I made this from 1/8 inch material I got from Ocooch Hardwoods. I don’t get anything for recommending them, I just really like their wood and shipping time. Always had a good experience.

The dimensions are 4 inches by 4 inches by 6 inches which may vary with the material you use. I have this dimensions for a few sizes listed in the product description.

If your nervous about the complexity of the setup, let these instructions ease your mind.

Download “Parts Bin Instructions”

Parts-Bin-Instructions.pptx – Downloaded 4071 times – 557.56 KB

Some Endorsed Products

The wood for this project came from Ocooch Hardwoods though I often use  https://amzn.to/3oyG8Xq #ad as well.

I would highly recommend  https://amzn.to/3epaUvY #ad I also use  https://amzn.to/3Nt9d0E #ad as well. It doesn’t adhere quite as well but it is one of only a few 12 inch wide rolls I could find. I like it so far because of how easy it is to get off.

If you want to make gluing a lot easier I recommend  https://amzn.to/3qxshSz #ad with  https://amzn.to/3IqnOHX #ad. It really helps!

Download Here

As an Amazon Associate I earn from qualifying purchases.

Posted on

Laser Cut Acrylic Crown

Laser Cut Acrylic Crown


Acrylic Crown

The laser cut acrylic crown is meant to be a crown based on one of my daughters favorite movies.

A very fun piece, to design. It’s close to the general shape of the one in the movie but you have to change the design a good amount to appease copyright laws. I think I am far enough away but will remove this if I have to. Hopefully, I am in the clear. It is a free download below and there is a quick video of the bending process.

Join the mailing list to be notified of future Free files, Paid files, or Training Videos!

The process for bending is really simple but it can be tedious. First, I tried using a heat gun, which is how I have seen bracelets made. It takes longer then I wanted. Next, I thought it might be easier to boil, so that’s what I did. A quick string on the ends to hold to the head and you’re good to go.

Posted on

Hanging Moon Shelf

The Hanging Moon Shelf Digital Download is actually a file I made a while back but apparently didn’t release properly. I think I had it as a flash free file but then never posted it again!? Designing gets busy sometimes I supposed. Really fun and really functional piece.

This is what it looks like.

Hang your crystals or trinkets up for all to see.

Assembly is really easy.

Download the instructions here if you want to see how its made before purchasing.

Hanging Moon Download Instructions (4915 downloads )

Join the mailing list to be notified of future Free file, Paid files, or Training Videos!


You can purchase the file from my site by clicking the ‘Shop Now’ button below or find it on Etsy here.


Some details

This is actually made from the same file as the standard moon shelf download so if you have that al well you will notice a lot of the dimensions are the same. I design everything in Fusion 360 so when I decided to make this a hanging version, I added a few extrusions and cuts to the old file and here we are.

This file was made for wood supplied from Ocooch Hardwoods. I usually use wood supplies from here or from https://amzn.to/3oyG8Xq #ad. When I do, my cuts interlock best when I design for a material thickness of .115 inches.

I tried a new tape this time too. It is from here https://amzn.to/3Nt9d0E #ad. I will have to use this a few more times before I can get a real review for you but so far I like it. I will say, It does NOT adhere as well as other products and that is partially what I like about it. It does the job of preventing smoke and burn marks and then comes right off.


Some dimensions

The material thickness this is dimensioned for is 1/8 inch (.125) and it works great. Reach out to me if you need it adjusted though and I will do what I can.

The entire design is 11 inches tall, ~10 wide, and 2.25 inches thick.

I will be using my batch conversion trick to turn all of my SVG’s into PNG and PDF’s on this file. If you haven’t learned the trick, its a real time saver. Take a look here.

This will require two and a half pieces of standard 12X20 inch laser sheets with some leftover.

Drop your thoughts in the comments below or join the conversation on Facebook in the Glowforge Creators group.

As an Amazon Associate I earn from qualifying purchases.


Posted on

LED Picture Frame

I kept seeing these LED picture frames online and finally decided to buy some. Of course, as I do, I made an really dumb error when I ordered them. Online, they had these listed for sale with a picture of the the Eiffel Tower, which I presumed to be an example of what is possible. Turns out it wasn’t. I got a bunch of these frames with Eiffel Towers engraved on them!

This is what it looked like when I ordered. I should have known better.

I will have these for sale (with blank, engravable, masked acrylic).

They aren’t listed yet but reach out to me at [email protected] or through Facebook at ThreeToedBear

I will be adding my designs to the page for free for these starting with the one below.


Join the mailing list to be notified of future Free file, Paid files, or Training Videos!


The Man. The Myth. The Legend.

Click below for download!

Download “The Man. The Myth. The Legend.”

The-myth-the-mad-the-legend.zip – Downloaded 4254 times – 12.47 KB

What Next?

As soon as I learned of my error I headed on over to CMS Acrylic. Once there, I ordered some clear acrylic to replace all of the pieces with towers on them. I cut out some new pieces for the frame and, hopefully, learned from the mistake.

I made a quick design to give as a gift with the writing, “The Man. The Myth. The Legend.” In between the text, I scored a square that is 4 inches tall and 5.3 inches wide to accommodate some photos I ordered off of Amazon. This helped to align the photo so it would be square on the fame.

The first time I added the photo, I added it to the front of the acrylic and taped the back of the photo to the acrylic. I simply folded a piece of tape over on itself and stuck it on thinking it would look better if no one could see tape marks. I saw something interesting though . . .


The engraving comes out great, especially lit up. In the four corners, however, you can see some light shining through the photo. This is where the tape was.

So, it got me thinking. If tape on the back allows light to shine through the photo itself, I wonder what glue covering the back of the photo would do.


And the result was cooler then I expected. The picture itself becomes visible in the dark!


Drop your thoughts in the comments below or join the conversation on Facebook in the Glowforge Creators group.

As an Amazon Associate I earn from qualifying purchases.


Posted on

Cribbage Board File Release

The cribbage board took a lot longer to get released then I like but at long last, here it is. For the card playing enthusiast or anyone who wants something on the coffee table to talk about! Really fun and really functional piece.

This is what it looks like.

You can use the decorative jut-outs to add some character, or leave them out and keep it elegant in its simplicity.

Assembly is a lot easier then it may look.

Download the instructions here if you want to see how its made before purchasing.

Cribbage Board Instructions (4366 downloads )

Join the mailing list to be notified of future Free file, Paid files, or Training Videos!


Some more details

I test cut all of my files before releasing them so that I can be sure there are not flaws. For the cribbage board design, the drawer was a little too tight of a fit. I couldn’t release it the way it was so I had to go back and edit. Now, its a good fit but slides in and out without resistance.

This file was made for wood supplied from Ocooch Hardwoods. I usually use wood supplies from here or from https://amzn.to/3oyG8Xq #ad. When I do, my cuts interlock best when I design for a material thickness of .115 inches. I didn’t tolerance to that number on this design because of the acrylic. The black and red piece are acrylic that I ordered from CMS Acrylic. They came in super fast and cut great. Everything fit perfect!


Click to see the assembly!

Some dimensions

The material thickness this is dimensioned for is 1/8 inch (.125) and it works great. Reach out to me if you need it adjusted though and I will do what I can.

The entire design is 4.75 inches wide, 10.5 long, and 2 inches tall.

I will be using my batch conversion trick to turn all of my SVG’s into PNG and PDF’s on this file. If you haven’t learned the trick, its a real time saver. Take a look here.

Keep an eye on the flash-free files for this one!

This will require two piece of standard 12X20 inch laser sheets with some leftover.

Drop your thoughts in the comments below or join the conversation on Facebook in the Glowforge Creators group.

As an Amazon Associate I earn from qualifying purchases.


Posted on 1 Comment

Repeating Hexagon Shelf

A new file in the works! This is a repeating hexagon shelf. You will be able to make one, two, as many as you want. The assembly should be very simple. There’s only three files. First, cut the bottoms. Then, insert the shelves. Next, insert the middle connector and just keep going.

repeating hexagon shelf

This is the overall design.

You can keep it small or make it tall.

Assembly is easy as can be!

Very adjustable.


repeating hexagon shelf middle connector
This is really the magic piece!

Your thoughts on the repeating hexagon shelf?

Let me know your thoughts. I love repeating patterns like this because it allows you to build bigger then the Glowforge allows.

I added some of the picture below so you can see what the pieces look like.

After making the middle connector pieces, I added a cutout on the shelves for a seamless design. However, there is nothing stopping you from using a simple rectangle.

Keep an eye on the flash-free files for this one!

I think I am going to try and make a version of this that will hang on the wall. I am not completely sure what that will look like quite yet but I think it will add a lot of flexibility to the files.

Drop your thoughts in the comments below or join the conversation on Facebook in the Glowforge Creators group.